Setting up Greenkeeper Enterprise
These are the full instructions for installing and authorising Greenkeeper Enterprise (GKE) on your own hardware.
What’s going to happen?
GKE is installed via a tool called Replicated, which requires some information from and setup in your GitHub Enterprise instance. Once the GitHub setup is complete, Replicated can do its job of downloading and installing GKE.
This entire installation process will probably take about 15-30 minutes if everything goes smoothly.
If you run into trouble or have any suggestions, please get in touch and we’ll help you as quickly as we can.
Prerequisites
Please make sure you’ve got all of the following on hand before you start installing GKE.
- Your Greenkeeper Enterprise license file (
.rli) - A Linux server with a minimum of 2 cores and 4GB memory, running an operating system from this list
- server ports
80,443, and8800accessible from your local machine
Step 1: Register a GitHub OAuth Application
Greenkeeper Enterprise talks to GitHub Enterprise via OAuth. You will need to create an OAuth app on your GitHub Enterprise that Greenkeeper Enterprise can connect to. To do this, open your user’s settings page on your GitHub Enterprise instance, and find the OAuth applications page, under Developer settings. Here, click the Register a new application button at the top of the page.
You’ll need to know the URL where your instance of Greenkeeper Enterprise will be running, but this only needs to be accessible from the machine your GitHub Enterprise instance is running on, it doesn’t have to be a public URL reachable from the internet. Let’s use http://gke.your-company.com as an example. Use it to fill the following fields like so:
- Homepage URL:
http://gke.your-company.com - Authorization callback URL: Append
/loginto the Hompage URL for this one:http://gke.your-company.com/login
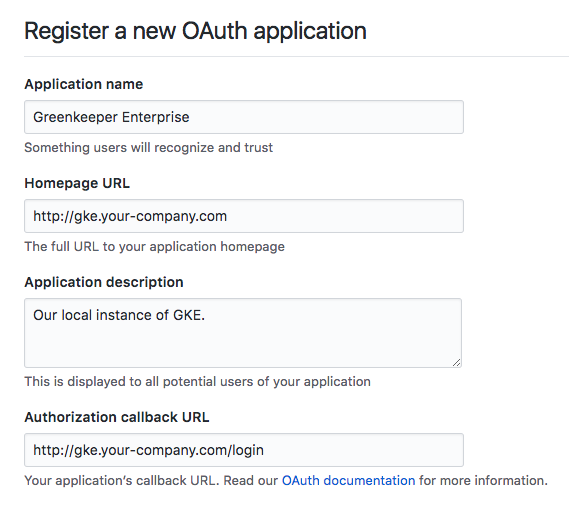
Make a note of the Client ID and the Client secret keys that are displayed once you‘ve set up the OAuth application, you’ll need them in step 3.
Step 2: Create a Greenkeeper Bot User and access token
Greenkeeper will have its own bot user on your GitHub Enterprise instance, which will open issues and pull requests and be the primary interface for your developers. You’ll need to sign up a new user on your GitHub Enterprise instance, with an explanatory name like your-company-greenkeeper-bot, for example. Here’s an icon you can use as the bot’s profile image:
Next, you’ll need a personal access token for this bot user. To set this up, go to the Personal access tokens page, under Developer settings, on the bot user’s settings page on your GitHub Enterprise instance. Click the Generate new token button at the top of the page, and then generate a personal access token with the repo scope.
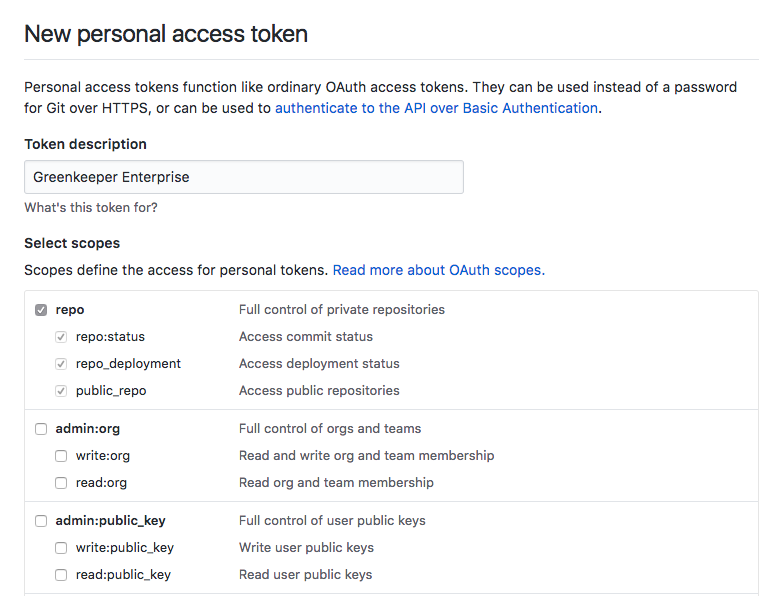
You’ll receive a personal access token, which you must copy now, you’ll never be able to see this again (but you can generate a new one whenever you like).
Finally, your Greenkeeper bot must have access to all repositories and organizations that should work with Greenkeeper Enterprise. You can make this happen by inviting the bot as a collaborator, just like you would any other user.
You should now have:- A new user that’s identifiable as your company’s Greenkeeper Enterprise bot
- A personal access token for that bot user
- Invited the bot user to all organisations and repos you want Greenkeeper to work on (optional, you can do this later)
With that sorted, we can install Greenkeeper Enterprise itself!
Step 3: Install and Configure Greenkeeper Enterprise through the Replicated App Manager
We’ll be using Replicated 2.0. Here’s the simplest installation option, via curl:
curl -sSL -o install.sh https://get.replicated.com/docker
sudo bash ./install.sh
Note: If you require a different installation method (airgapped, for example), or if anything goes wrong, please refer to Replicated’s installation docs.
This will install the management application, which takes care of downloading and installing Greenkeeper Enterprise, as well as providing a simple web interface for setting up the platform, and for viewing runtime metrics. You may be prompted to enter the IP address of the current machine, since the installer may not be able to determine it. Once the script has run, you can navigate to https://[server]:8800 to complete the setup. This page has a self-signed certificate which your browser will likely complain about. Ignore this warning, you can fix it
in the first step of the installer.
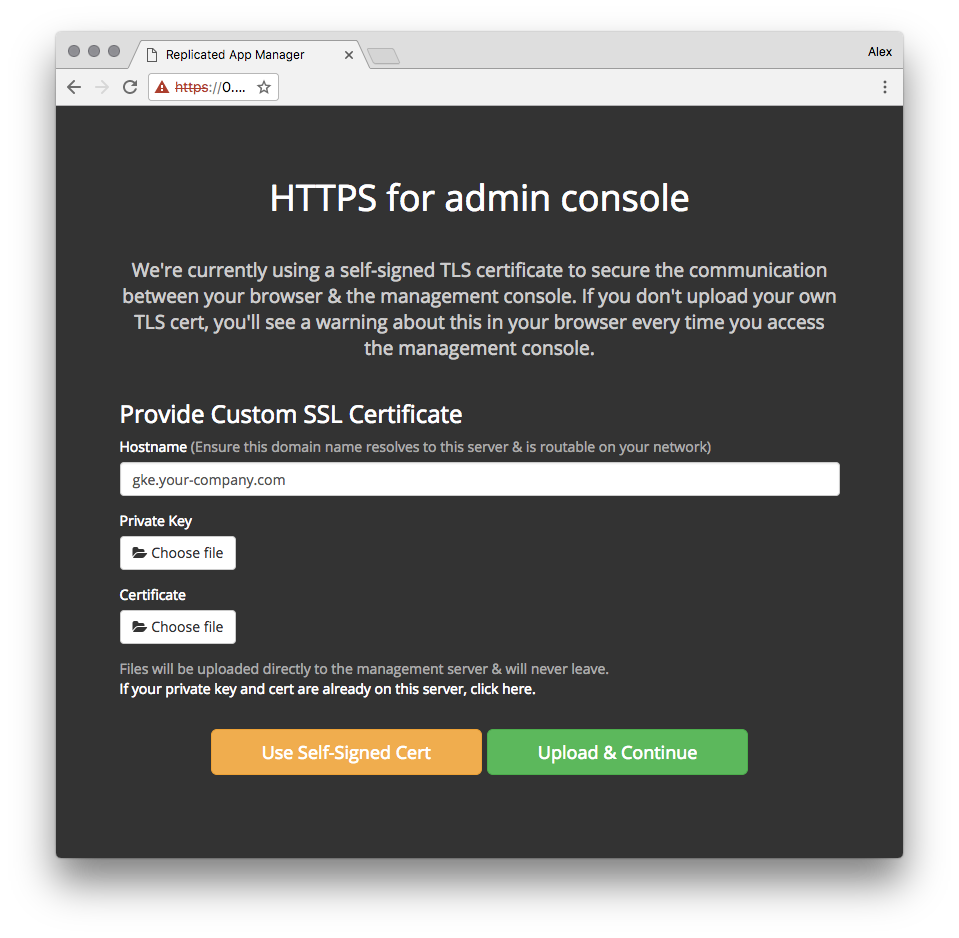
Step 3.1: SSL Setup for the Admin Console
You have the option of providing an SSL certificate so you won’t get an invalid cert warning every time you open the management console.
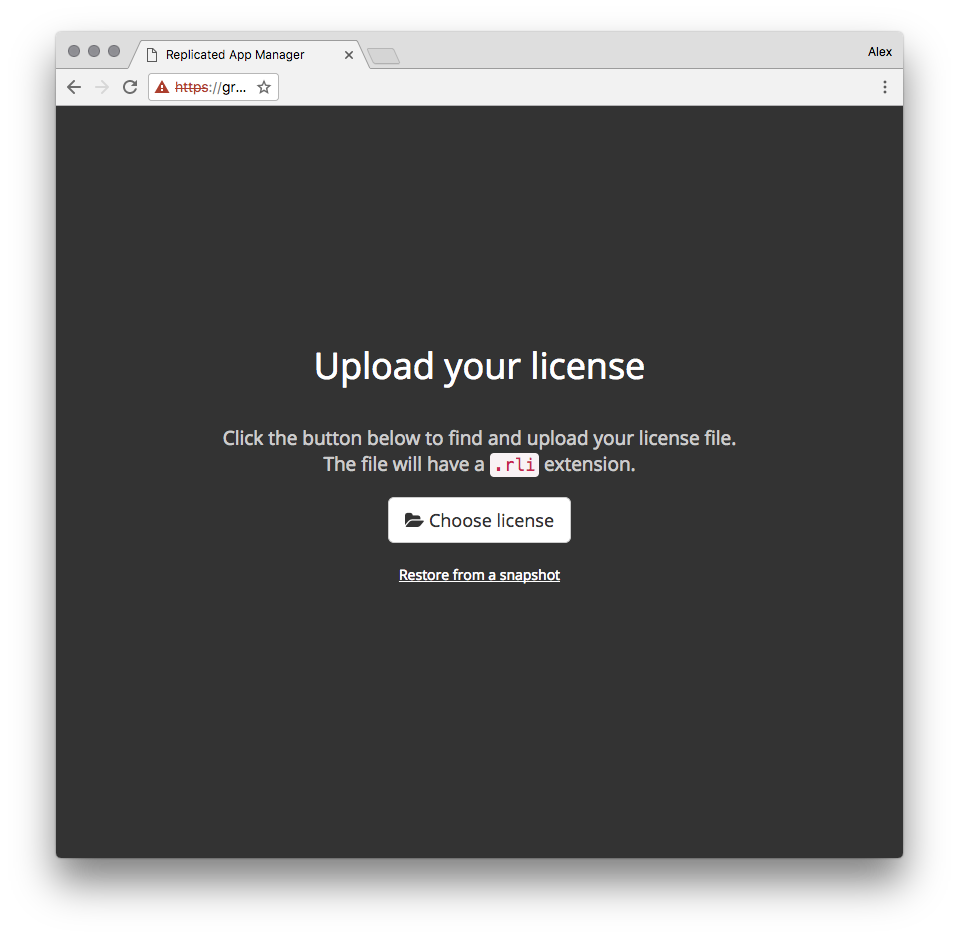
Step 3.2: Upload your license file
Upload your Greenkeeper Enterprise license file (.rli)
Step 3.3: Secure the Admin Console
Set a username and password for the admin user.

Step 3.4: Connect with GitHub Enterprise
Now we connect Greenkeeper Enterprise with your GitHub Enterprise instance:
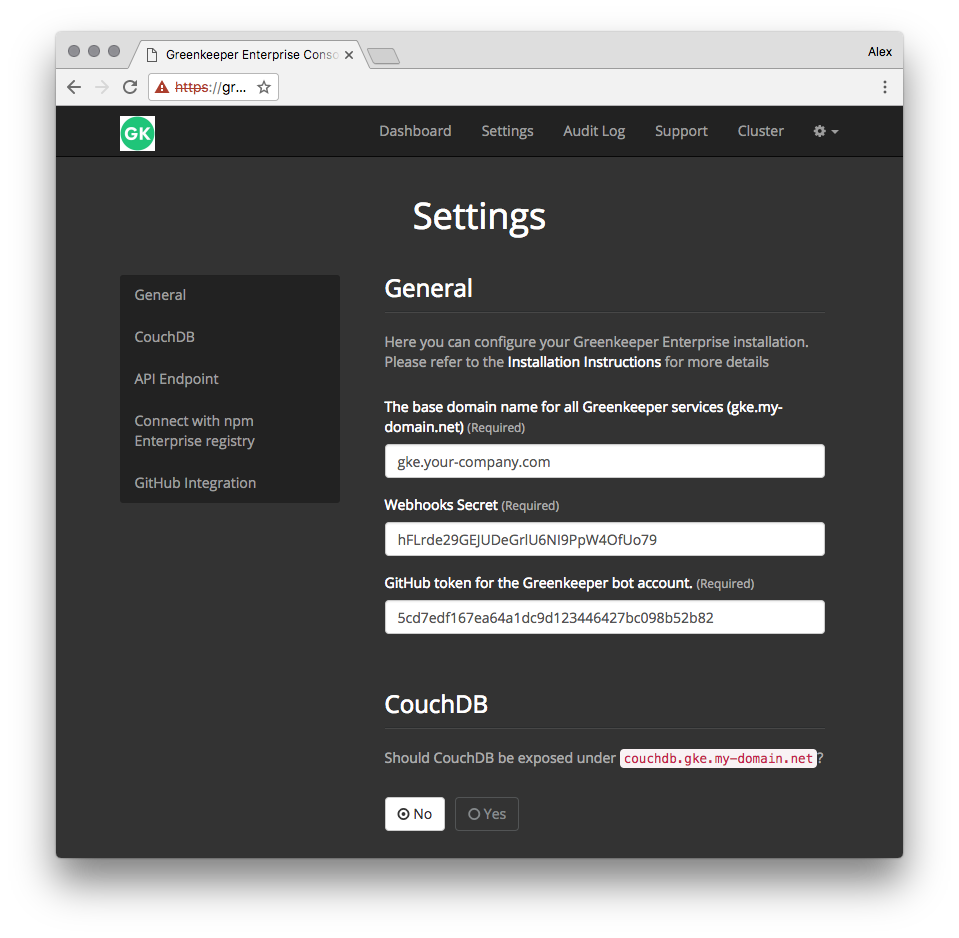
- The base domain is used to expose all Greenkeeper Enterprise services. You must set up two DNS records (
gke.your-company.comand*.gke.your-company.com) that point to the server. For testing you can also usehttp://xip.io: Just set the base domain name to1.2.3.4.xip.io(where1.2.3.4is the IP address of your server). Optional: Letsencrypt instructions. - The webhooks secret should be pre-filled
- The GitHub token is the personal access token you set up for your bot user in step 2.
Optionally, you can choose to expose the CouchDB used by Greenkeeper Enterprise to store data.
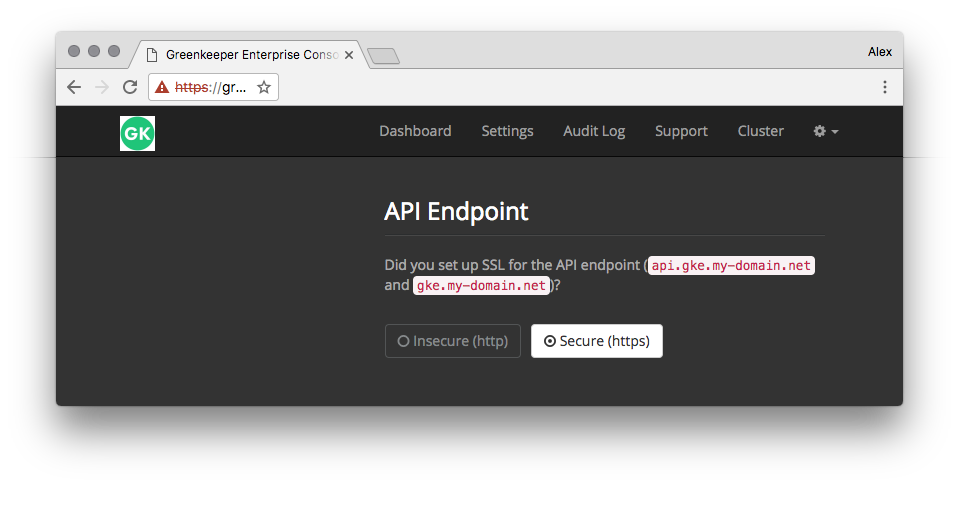
Step 3.5: SSL for the Greenkeeper Services
Add your certificate and private key to the /data/cert/ folder on the server/VM.
/data/cert/gke.my-domain.crt/data/cert/gke.my-domain.key
Don’t forget to set the API Endpoint here, and the GitHub OAuth app’s authorizsation callback URL (all the way back in step 1) to https.
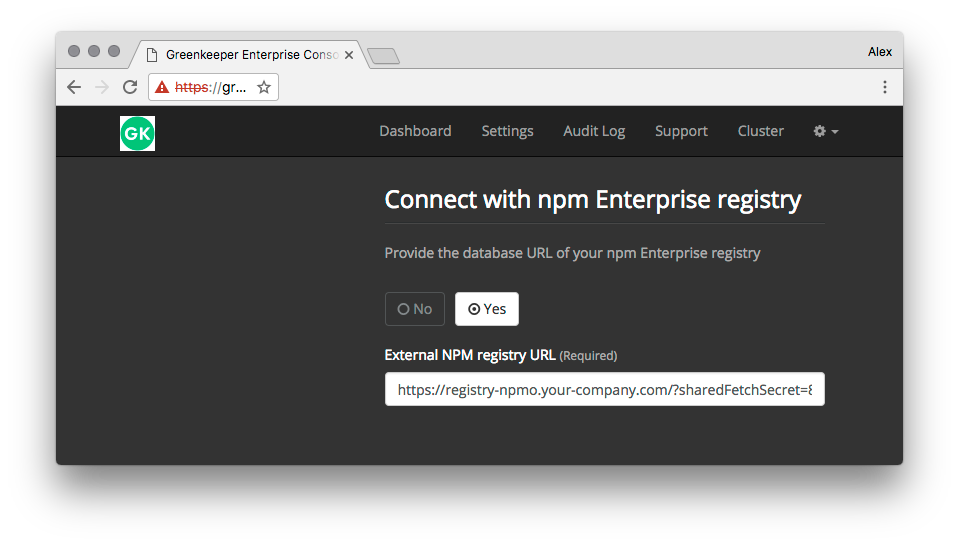
Step 3.6: Connect with your npm On-Site registry
If you have access to your own On-Site npm registry, you can add that URL here. To obtain your sharedFetchSecret please ask the sysadmin that set up npm On-Site, or npm directly.
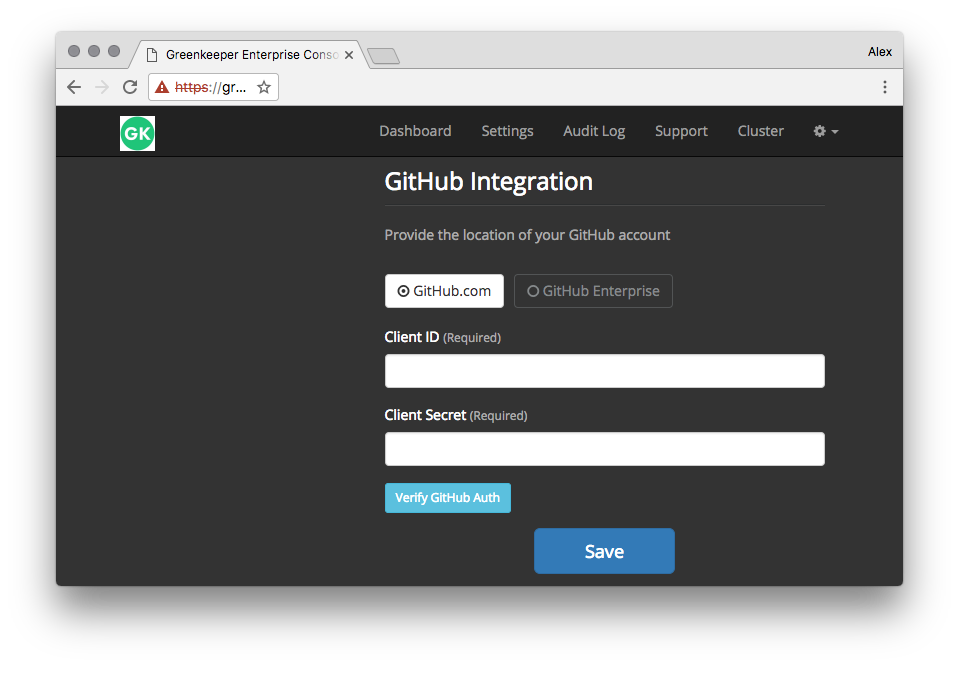
Step 3.7: GitHub Integration
Select which GitHub you’re using and enter the Client ID and Client secret from step 1.
Step 4: Configuring your local Greenkeeper Client
- Install the Greenkeeper CLI with
npm install -g greenkeeper@4. This will give you agreenkeepercommand in your shell. - Tell Greenkeeper about your API endpoint with
greenkeeper config set api https://api.gke.yourcompany.com. - Next, do
greenkeeper login. This will open a browser window and authenticate your GitHub Enterprise user with Greenkeeper Enterprise.
Step 5: Enabling Your First Repository
- Navigate to your package’s directory:
cd /path/to/your/git-repo - Run
greenkeeper enablein that directory - Repeat for any other repos you’d like to enable
- Done! 🌴
Note: Backups
All important files that should be backed up are located in the /data folder.
Congratulations! You’re done!
You should be all set now. Remember that you have to invite your Greenkeeper bot user to the organisations and repositories you‘d like Greenkeeper to watch, otherwise nothing will happen.
Again, if you run into trouble or have any suggestions, please get in touch and we’ll help you as quickly as we can.
We hope everything went well!
All the best from the Greenkeeper team 🌴